One habit I've brought to Scrivener from Word is to insert graphics and tables as I write. I like to include cross-references to them in my text as I peck along. Word has an effective way of doing that via the Insert | Caption and Insert | Cross-Reference menus. An advantage is that numbers are automatically updated and regenerated (at least at print-time) if you move things around. Disadvantages to Word's implementation include limited call-out flexibility (for example, you can label a figure with "Figure" but not "Fig." or "FIGURE" as some publications mandate). And there's Word's annoying habit of forcing you to wade through much of the full menu with each entry, and of course there's always the Random Format Generator that seems to kick in whenever you ask Word to do anything.
After much googling it seems there is a way of doing something quite adequate in Scrivener to support cross-references.
What the Scrivener folks have implemented in recent releases is an expansion of their Auto-Number functionality, which let you insert a placeholder (such as <$n> to specify an Indo-Arabic numeral placeholder) that, on compilation, would be filled-in with a number in proper sequence.
The placeholder code can now be appended with a type code for the cross-reference, and a label of your choice. For example, expanding on the Scrivener draft I started in my last post, I've pasted in a couple of graphics from one of my source references (a time-series graphic and some statistics stuff) and typed in cross-reference codes of my own choosing to help me keep track as I write.
Here's how it looks as I compose my draft in Scrivener (click to enlarge):
Note the cross-reference callouts, <$n:figure:time_series> and <$n:figure:statistics_stuff>. These will render only as numbers when compiled. The numbers will be in simple order of appearance in the document. Although codes such as these are a departure from WYSIWYG and may seem a little WordStar-ish, they do have the benefit that I can quickly see that they reference figures, and that one references the time series while the other references the statistics stuff. That's actually nice for composing-- in Word's way of doing things, I have to scroll down to see what "Figure 1" points to.
Here's how it looks when exported ("compiled") to Word:
And here's what happens when the citations in the text are reversed... note the citations are renumbered in order of appearance.
Showing posts with label Software. Show all posts
28 July 2012
How to use Zotero to make citations easy in Scrivener
I'm spinning up a lot of writing lately, and I'm finding Scrivener to be a marvelous tool for getting drafts accomplished. It's founded on a nifty notion: by separating the composition and presentation of written work, both are facilitated.
Not only is Scrivener more stable and less intrusive for writing than Word, but it has built-in organizing and bookshelf capabilities that help me collect necessary background information, get my thoughts sorted, and chapterize and reorganize things as makes sense. It's easy on the eyes and very thoughtfully put-together-- obviously a tool constructed by a writer for writers. And, once my draft is done, it exports to Word and other formats beautifully, so editors or colleagues don't need to use Scrivener also. (However, it's available for Windows now, so those editors-and-colleagues are missing a treat if they don't. Even Linux users can get in on the fun.)
One thing Scrivener (and Word) is missing is slick citation and bibliography management. Scrivener natively supports EndNote, a Thomson Reuters bibliography-management package. But that solution costs several times what Scrivener itself does. I'm sure it's a very powerful solution, but for me it's overkill.
By comparison, Zotero is a free, cross-platform, open-source, cloud-enhanced "personal research assistant" that performs critical citation management and bibliography functions. I've used it off and on for years, but until recently it supported only the Firefox browser. I much prefer Safari (yay, Reader mode! yay, ctrl-shift-I to email an article!), so it was with delight that I discovered Zotero is now available as a stand-alone app and supports Safari via an extension. http://www.zotero.org/support/3.0 has all the download options; scroll down for the Zotero Standalone app and the Connector extensions for Safari and Chrome.
So here's a straightforward workflow to start with. (Click the photos for a closer view.)
Most scholarly publications (and many others, including web pages) are automatically supported by Zotero. You'll see the Zotero button to the left of the omnibar turn from
to
to indicate the article is capture-able by Zotero. Click it, and the citation will automatically be added to your folder in Zotero.
...Now you have the citation information in Zotero and the source item in your Scrivener project binder. (If it's a web page, it'll be stored fully rendered-- absolutely marvelous for making productive use of airborne hours.) As you write, ctrl-opt-F lets you search your entire project for keywords-- a boon.
Then, select the citation and make it into an inline footnote:
The citation remains readable to me as I write:
...but it will turn into a footnote when I export (compile) it to send to an editor or colleague:
Here's what it looks like in Word:
You can get much fancier. If, for example, you need to submit your manuscript to several places which might mandate different citation formats, blogger Liz at Confectious.net has documented a very slick way of putting textual cites in your manuscript in curly braces and then having Zotero scan, format and output your work with the necessary citation format.
Not only is Scrivener more stable and less intrusive for writing than Word, but it has built-in organizing and bookshelf capabilities that help me collect necessary background information, get my thoughts sorted, and chapterize and reorganize things as makes sense. It's easy on the eyes and very thoughtfully put-together-- obviously a tool constructed by a writer for writers. And, once my draft is done, it exports to Word and other formats beautifully, so editors or colleagues don't need to use Scrivener also. (However, it's available for Windows now, so those editors-and-colleagues are missing a treat if they don't. Even Linux users can get in on the fun.)
One thing Scrivener (and Word) is missing is slick citation and bibliography management. Scrivener natively supports EndNote, a Thomson Reuters bibliography-management package. But that solution costs several times what Scrivener itself does. I'm sure it's a very powerful solution, but for me it's overkill.
By comparison, Zotero is a free, cross-platform, open-source, cloud-enhanced "personal research assistant" that performs critical citation management and bibliography functions. I've used it off and on for years, but until recently it supported only the Firefox browser. I much prefer Safari (yay, Reader mode! yay, ctrl-shift-I to email an article!), so it was with delight that I discovered Zotero is now available as a stand-alone app and supports Safari via an extension. http://www.zotero.org/support/3.0 has all the download options; scroll down for the Zotero Standalone app and the Connector extensions for Safari and Chrome.
So here's a straightforward workflow to start with. (Click the photos for a closer view.)
1) Gather your research.
Start with Zotero open. Select (highlight) the folder into which you want your citations collected. In Safari, browse to source articles.Most scholarly publications (and many others, including web pages) are automatically supported by Zotero. You'll see the Zotero button to the left of the omnibar turn from
to
to indicate the article is capture-able by Zotero. Click it, and the citation will automatically be added to your folder in Zotero.2) Add your source items to your Scrivener project for offline access.
Now drag the little icon next to the URL in Safari's omnibar into your Scrivener project....Now you have the citation information in Zotero and the source item in your Scrivener project binder. (If it's a web page, it'll be stored fully rendered-- absolutely marvelous for making productive use of airborne hours.) As you write, ctrl-opt-F lets you search your entire project for keywords-- a boon.
3) Write.
What I've been doing is spewing words onto the draft, and when comes time to insert a citation I just type two brackets [] and then drag the citation into them from Zotero:Then, select the citation and make it into an inline footnote:
The citation remains readable to me as I write:
...but it will turn into a footnote when I export (compile) it to send to an editor or colleague:
Here's what it looks like in Word:
You can get much fancier. If, for example, you need to submit your manuscript to several places which might mandate different citation formats, blogger Liz at Confectious.net has documented a very slick way of putting textual cites in your manuscript in curly braces and then having Zotero scan, format and output your work with the necessary citation format.
09 July 2011
How to Quickly Vet your Applications for Lion Compatibility (and Why You Should)
OS X Lion is coming, probably this week, and it looks to be a compelling upgrade (and affordable at a reported $29 in the U.S., or $49 for a five-license family pack). No trip to the store is needed-- it will be available exclusively over the Internet via the App Store, which you'll find under the Apple logo up at the upper left corner of your screen on your fully-updated Snow Leopard machine.
With Lion, Apple is finally cutting the cord of the long-obsolete PowerPC architecture. Until now, programs written specifically for the ancient PowerPC chips would still run on Macs based on Intel chips via an automatic emulator that OS X would use. This emulator was called Rosetta... and it's finally been put out to pasture in the era of Lion.
There are many reasons why this is good--faster operation, fewer bugs, conservation of disk-space, better and more consistent user-interface features, smoother integration--but the one obvious negative is that you might currently have applications on your Mac that rely on Rosetta. That software will have to be upgraded or removed.
Now, you could go through your Applications folder and look at each application's type by command-clicking Get Info. But there's a much better way to do it all-at-once (Hat tip: Cult of Mac).
Here's How:
The most common obsolete applications are Microsoft Office 2004 and Quicken. To my chagrin, LabVIEW 8.6 is there, too. (That's a real surprise-- it's so fast, I had no clue it was being run in the emulator.) (UPDATE: It appears the Rosetta issue for LabVIEW 8.6 is limited to drivers, though there is an additional 32-bit issue with kexts.)
Deal with obsolete apps before upgrading to Lion
For one thing, the removal utilities that come with some of them (such as Microsoft Office) are themselves PowerPC-based. Or, you may need the old version to export your files to some new, Rosetta-free application-- and I'm talkin' to you, Quicken-- for which there is no Intel- or Universal-based update. Fortunately, in the case of Quicken there are many alternatives. See this superb list compiled by TUAW after Intuit, Quicken's publisher, sent an infuriating email to its users with lame suggestions on how to work in the post-Lion world. Really, now, Intuit: on pg. 102 of Scott's Big Book of Pithy Pronouncements is: "Competitors are made, not born." Q.E.D.
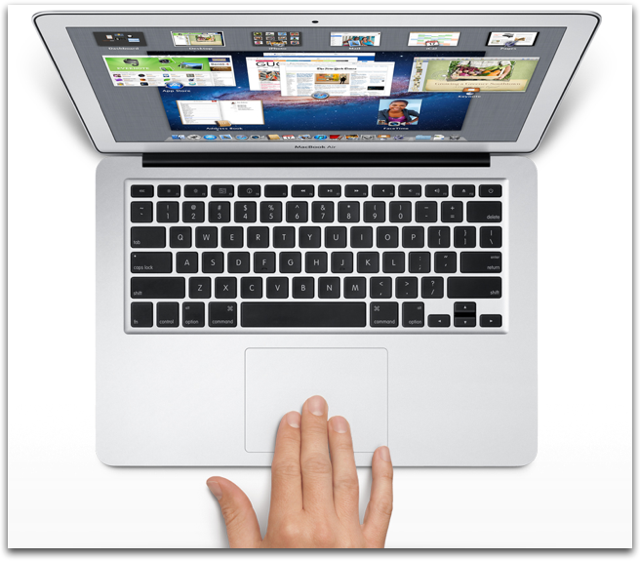
| Photo courtesy of Apple. Read all about OS X Lion on Apple's site |
There are many reasons why this is good--faster operation, fewer bugs, conservation of disk-space, better and more consistent user-interface features, smoother integration--but the one obvious negative is that you might currently have applications on your Mac that rely on Rosetta. That software will have to be upgraded or removed.
Now, you could go through your Applications folder and look at each application's type by command-clicking Get Info. But there's a much better way to do it all-at-once (Hat tip: Cult of Mac).
Here's How:
- Open the Terminal. (If you don't know how to do this, just type "Terminal" in Spotlight and it will show up as an application.)
- Cut the following line from here:
system_profiler SPApplicationsDataType >~/Desktop/MyFileTypes.txt
...and paste it into the Terminal, then hit the Return button on your keyboard.
What will happen now is that a text file entitled MyFileTypes will appear on your desktop. It might take a couple minutes. Go have a cup of tea while your Mac does your work for you.
- When the process is complete, quit the Terminal and double-click the MyFileTypes file on your desktop.
The most common obsolete applications are Microsoft Office 2004 and Quicken. To my chagrin, LabVIEW 8.6 is there, too. (That's a real surprise-- it's so fast, I had no clue it was being run in the emulator.) (UPDATE: It appears the Rosetta issue for LabVIEW 8.6 is limited to drivers, though there is an additional 32-bit issue with kexts.)
Deal with obsolete apps before upgrading to Lion
For one thing, the removal utilities that come with some of them (such as Microsoft Office) are themselves PowerPC-based. Or, you may need the old version to export your files to some new, Rosetta-free application-- and I'm talkin' to you, Quicken-- for which there is no Intel- or Universal-based update. Fortunately, in the case of Quicken there are many alternatives. See this superb list compiled by TUAW after Intuit, Quicken's publisher, sent an infuriating email to its users with lame suggestions on how to work in the post-Lion world. Really, now, Intuit: on pg. 102 of Scott's Big Book of Pithy Pronouncements is: "Competitors are made, not born." Q.E.D.
Subscribe to:
Posts (Atom)